Showing posts with label #54. Show all posts

Saturday, September 8, 2012

#54. Master my mum's Italian recipes - Fritole

[Image by buttalapasta]
Fritole are Italian doughnuts, traditional to the Northern part of Italy. They are made in Venice during Carnivale and in other parts they are made for Christmas.

My Mum has always made them for New Years and I have always wanted to know how to make them.

We dug up a recipe that resembled something similar to how Mum makes it.

I haven't had a chance to make the Fritole yet, but I wanted to share the recipe with you all so you can give it a go.

They are really worth it (even if they are deep fried!)

Fritole
Ingredients
About 400grms of plain flour*
50 grams of caster sugar
30g of sultanas/raisins (soaked in rum – about 2 shot glasses) – you can add more or less sultanas if you wish
30g of yeast*
500ml of milk
3 eggs
Zest of 1 lemon (Mum added the rind to the caster sugar to flavour the sugar)
Cinnamon powder
Canola oil to fry
Vanilla/icing sugar to dust the Fritole when they are done

* Instead of using yeast/plain flour, Mum uses self-raising flour. She adds about 500grams and just makes sure that the consistency is really doughy

Method
In a bowl dissolve the yeast with some lukewarm milk (ignore this step if you use self-raising flour)

In a mixing bowl mix the eggs and the sugar together, add the cinnamon and the lemon zest to this. Slowly add some of the flour and then add some of the milk. Do this in batches until you get the consistency of dense cream, you can add more or less of each. Add the raisins (and if using yeast let it rise for about 1 hour).

Note: Mum also added a few tablespoons of the canola oil into the batter once all the ingredients are combined. Supposedly it stops more oil than necessary absorbing into the doughnuts when frying.

Heat the oil in a heavy based pan.

Add a spoon full of the batter into the oil so they resemble small doughnuts (as in the picture above). When they are cooked, they should flip over by themselves and start cooking the other side. If this does not happen, you can flip them over yourself. Do this in batches and remove the Fritole out of the oil when they are golden brown.

Cool down on paper towels.
Add the icing sugar to the Fritole.

Eat and Enjoy!

Wednesday, June 27, 2012

#54. Master my mum's Italian recipes - Sugo (Bolognese)


The Sugo simmering away [image by Zahara Dessert]
One of the first of my Mother's recipes that I mastered was her Bolognese Sauce...or as we call it at home - Sugo (which just means sauce in Italian).

And although it tastes great, I can never make it taste exactly like my mum's.

Despite this, I thought I would share with you her recipe, so you can give it a go.

The bouquet garni [image by Zahara Dessert]
Ingredients*
1 kg of very good quality mince (a 50/50 mix of Veal and Pork)
1 large onion finely chopped
2 or 3 tablespoons of Extra Virgin Olive Oil
3 x 400gram cans of diced tinned tomatoes
1 bottle of Tomato passata (usually a bottle is 750ml)
1 tablespoon of tomato paste
Bouquet Garni (a mixture of fresh rosemary, sage, thyme and/or basil]
Salt and Pepper

* Note you can double or halve the quantities if you wish

The Sugo after it has cooked for over an hour [image by Zahara Dessert]
Method
Heat the Olive oil in a heavy based saucepan on a medium heat and add the chopped onions.
Saute the onions and when the onions starts to go a pale yellow, add 1 tablespoon of warm water to the onions. Stir through and allow the water to evaporate. Once the onions have dried, repeat this step. Do this about 3 or 4 times. (By adding the water, the onions become translucent and almost melt away in the final Bolognese sauce).

Add the mince to the onions. Break up the mince and allow it to cook through.

Once the mince is cooked and any moisture has gone, add the tinned tomatoes, Passata and the tomato paste.

Mix well.

Then add the bouquet garni and season with salt and pepper

Bring the sauce to the boil, then reduce heat and simmer for at least 2 or 3 hours, mixing the sauce every 20 minutes or so.

Once you think it is ready, test the sauce for seasoning and add more salt if you think it is necessary.
Also make sure you remove the Bouquet Garni.

Serve the Sugo on your choice of cooked pasta.
I personally LOVE a Bolonese Sugo with Spaghetti or Fettuccine.
Husband likes his with Penne.

Apologies for the photos, I must stress again I am not a food blogger... but I promise I will try to improve the photos in future food posts

The final result... I need to improve my food styling! [image by Zahara Dessert]
 Enjoy!

Wednesday, May 16, 2012

Little Piggy Rolls


Bacon and Cheese Rolls [image by Zahara Dessert]
I have noticed that when you get a dog and you are out walking said dog, complete strangers have no qualms about coming up to you and having a chat. It also doesn't help that Ziggy-Stardust is quite pretty and often people just stop us to tell me how beautiful SHE is (Poor thing... it is not his fault he looks so feminine!).

Getting a dog has also been a really good way of meeting the people in my local neighbourhood, as before Ziggy we only really knew a very small handful of our neighbours.

We live near a big park where a lot of people walk their dogs. Somehow we have joined what I call a 'Mothers Group'. It consists of a group of people who meet up after work and catch up while their dogs go mad playing with each other.

This group is made up of people from all walks of life and I feel that I am starting to make some great 'new' friends.

My 'new' friends and I decided that it would be a great idea to meet up on a sunny Sunday afternoon with some wine and food and have a picnic in the park while our dogs played. We have done this twice now and both times we have gotten very tipsy and really enjoyed each others company.

For the last picnic I made my mums 'Bacon and Cheese Rolls', something she has made to bring to picnics for as long as I can remember. These rolls were an amazing success at the dog picnic, so I thought I would share with you the recipe, as I said I would for #54 of the Life List.

Ziggy hanging out in the park [image by Zahara Dessert]
The Recipe
Ingredients
The Bread Dough
(I based this on Jamie Oliver's 'Basic Bread Dough Recipe from 'Happy Days with the Naked Chef').

1kg of bread flour (plain)
625ml of tepid water
3 x 7g sachets of dried yeast
2 tablespoons of sugar
2 tablespoons of salt
extra flour for dusting

The Fillings
I did 2 flavours - Bacon and Cheese and Olive and Rosemary.
You can do any flavour combination you wish.
(if you want, you can remove the cheese from this recipe)

Bacon and Cheese
250 grams of bacon, chopped finely
1 large onion, chopped finely
250 grams of grated cheese (I used a combination of tasty and Romano cheese)

Olive and Rosemary
250 grams of olives (pitted) - I prefer Kalamata
1 large onion, chopped finely
250 grams of grated cheese (I used a combination of tasty and Romano cheese)
2 sprigs of fresh Rosemary

Method
The Bread Dough
Pre heat your oven to 180 degrees Celsius.

Meanwhile, put the flour in a large mixing bowl and make a well in the centre of the flour. Pour in half the water in the well and then add the yeast, sugar and salt and stir with a fork.

Slowly bring in the flour to the centre and combine the ingredients together. The flour should start feeling like rolled oats. Add the remainder of your water. Continue to mix until is starts getting sticky.

Flour your hands and turn the dough out onto a clean work surface. Continue mixing. If you feel the dough isn't coming together add some more water or flour.

Continue needing the dough for 5 minutes, where you should get a silky and elastic dough (see photo below).

Once you have this, shape the dough into a ball and place it back into the mixing bowl. Cover with cling film and allow it to prove for a about 30 minutes, or until it has doubled in size.

[image by Zahara Dessert]

I put the dough outside to prove in the sun [image by Zahara Dessert]
 While the dough is proving, start to make your fillings.

The Fillings

Bacon and Cheese
Finely chop the onions and bacon and add to a pan with a little olive oil. Fry over a medium heat until the onions are translucent and the bacon crispy.

Take off the stove to cool.

Bacon and Onion [image by Zahara Dessert]
 Olive and Rosemary
Finely chop the onion and add to a pan with a little olive oil. Fry over a medium heat until the onions are translucent. Add the chopped pitted olives and the rosemary leaves. Warm through.

Take off the stove to cool.

Olive and Rosemary [image by Zahara Dessert]
The dough now should have doubled in size.

Take the dough out of the bowl and cut into 4 portions.

[image by Zahara Dessert]

Roll out a portion of the dough with a rolling pin until it is quite thin and resembles a pizza base.

Now add half of your filling onto the base, and make sure you spread it out over the entire dough. Add the cheese over the toppings.

[image by Zahara Dessert]
Once you have done this, pull the dough and roll up over the filling so you make a long snail like scroll. The end result should look like a long sausage. Tuck the ends of the sausage in, so no filling escapes.

Repeat for the other portions of dough and fillings.

[image by Zahara Dessert]

Using a floured knife, cut the dough into 8-10 portions. Place gently onto a tray with baking paper and flour.

Let the dough prove again for about 30 minutes.

Add to the oven and bake for about 20 minutes or until the scrolls are golden brown.


These scrolls are also great for breakfast or an afternoon snack.

As I have said before, this is a not a food blog, so please excuse the un-styled and unprofessional photos!

Enjoy!

Saturday, March 31, 2012

Little balls of cheesy goodness

'husband' has been working crazy hours and is now working Saturday and Sundays. It will be like this until the movie he is working on is finished.

I thought given he has been quite stressed, he would like to come home to a home cooked meal.
As I had some fresh ricotta, I thought I would make my tried and tested Ricotta Gnocchi.

I started making this recipe when my attempt at making potato gnocchi failed dismally.
As I have said before, my family are from the North of Italy, so I didn't grow up with this type of food.

I thought I would share the recipe with you, the gnocchi are very easy to make and they truly are 'little balls of cheesy goodness'.

Ingredients
100 grams of plain flour
(Plus more for sprinkling as you roll out the gnocchi)
500grams of fresh ricotta, drained of excess water. I use the wonderful ricotta from Paesanella.
1 egg, lightly beaten
½ teaspoon nutmeg
1 cup of a mixture of Grana padano and Pecorino Romano cheeses, finely grated
a pinch of salt
 
Method
Put a large pot of salted water on the stove and bring to the boil.

Pass the ricotta through a potato ricer into a mixing bowl.
Add the rest of the ingredients into the same bowl and gently mix together.
(Try not to over work the dough as the more you work it, the tougher the gnocchi become).

Empty the contents of the bowl onto a floured surface.

Bring a separate small saucepan of water to the boil, this is to test the gnocchi dough, to make sure the gnocchi don’t disintegrate when cooked. Remove a small piece of the dough and roll out with your fingers and make a little ball of 1cm thickness. Add this to the small boiling pan. If it disintegrates, add more flour to your dough. If not, proceed to roll the rest of the gnocchi out.

To make the gnocchi, cut the dough in small portions and roll the dough out on a lightly floured surface to about a 2cm thick/40cm long shape - it should look like a long log.
Use a lightly floured knife to cut the log into 2cm long pieces. In your hands, roll the pieces into a small ball. Again try not to overwork the pasta when you do this.

Place the little balls on a floured tray as you go (see pic below).

I doubled the quantity of the recipe so I could have left overs
[image by Zahara Dessert]
(This gnocchi can be used fresh or can be frozen)

In the meantime, cook the gnocchi in plenty of rapidly boiling salted water and as they come to the surface scoop them out using a perforated utensil. Then place them in the sauce or onto a plate (see picture below).

This recipe serves 2 people with left overs.
Note: You can double the quantities if you want to make more.

I added an Amatriciana sauce to my gnocchi, but any sauce will do.
A tip = Pesto goes really well with the gnocchi also.


[image  by Zahara Dessert]


You can tell this is not a food blog, as I have no clue how to style my food when I take photos!
They tasted better than they look... trust me
[image by Zahara Dessert]

The gnocchi are also very good for left overs the next day... I am eating my left over gnocchi as I write this post

Friday, February 10, 2012

#54. Master all my mum's Italian recipes - PIZZA


My Homemade Pizza [image by Zahara Dessert]
My parents are from a city called Trieste, in the North of Italy (near Venice).
The food in Trieste is unlike any other area in Italy. You are much more likely to find polenta, sauerkraut and bread dumplings on a restaurant menu, rather than the stereotypical Italian dishes such as pasta and pizza.

However having said that, my mother still makes amazing pasta dishes and on special occasions she also makes gnocchi and pizza.

Since #54 on my Life List is 'Master all my mum's Italian recipes' I thought I would start by making Pizza.

I have been making home made Pizza for a while now and I thought I would share with you my recipe.

Some of this recipe is based on my mum's, the rest is an amalgamation of other recipes I have tried and tested along the way.

Pizza by Zahara Dessert
Serves 2-4 people (with left overs)
You can double the quantities of the Pizza Dough if you want to make more

Ingredients
Tomato Salsa
2/3 cloves of sliced garlic
1 can of peeled tomatoes
4 or 5 torn leaves of fresh Basil
Salt and Pepper to taste
Grilled Grape Tomatoes
1 punnet of Grape Tomatoes (about 350grams) (large Cherry Tomatoes will suffice also)
Extra Virgin Olive Oil
Salt and Pepper
Pizza Dough
500g pizza flour (00)
1/2 tablespoon fine salt
1 x 7g sachets of dried yeast
1/2 tablespoon caster sugar
about 320ml lukewarm water
Toppings
Bocconcini or Buffalo Mozzarella
Capers
Anchovies (optional)
Sliced mushrooms
Sliced chorizo sausage
Black olives
Dried Chili flakes (optional)
Add any other toppings you fancy

(I know my grandmother would turn in her grave, but I don't mind a good ham and pineapple pizza!) So the toppings are based on your own personal taste

Method
Grilled Grape Tomatoes
Preheat your oven to 150 degrees Celsius
Slice the tomatoes in half
Place the tomatoes and oil in a bowl, season with salt and pepper and combine with a spoon, so the oil covers all the tomatoes
Place the tomatoes cut side up on a baking tray, which has been lined with baking paper.
Roast for 25 minutes or until the tomatoes are shriveled.
Set aside

The Grape tomatoes before they went into the oven  [image by Zahara Dessert]


Increase oven to 230 degrees Celsius

Tomato Salsa
Heat the olive oil and sliced garlic in a heavy based pan.
Don't let the garlic burn.
When the garlic is sizzling, add a can of peeled tomatoes and the torn Basil leaves.
Add salt and pepper and let the sauce simmer some more.
Stir occasionally.
It should take about 15/20 minutes for the sauce to reduce.
Taste to make sure there is enough seasoning.
Let it cool and set aside until you need to use it on the pizza.

The tomato salsa for the base [image by Zahara Dessert]
Pizza Dough
Sieve the flour and salt in a large mixing bowl and make a well in the middle.
In a small jug, mix the yeast, sugar and olive oil into the warm water and leave for a few minutes.
Pour the liquid into the well.
Bring the flour in gradually from the sides and mix it all together.
Take the dough out of the bowl and knead the dough on a lightly floured surface for about 10 minutes.

Jamie Oliver has a good step by step guide to making pizza dough here
The dough when it is resting [image by Zahara Dessert]
You can either use the dough immediately, or wrap it in clingfilm and put it in the fridge (or freezer) until required.
The dough in portions [image by Zahara Dessert]
Roll out the portions of dough. Try to make about 20cm circles (I just made sure it fit on my pizza tray).

Try to roll the dough out as thinly as possible. If it is too thick, the dough tastes bready.

Bake the pizza's using a pizza stone if possible, this makes the pizza taste that little bit better.


The dough [image by Zahara Dessert].
Note: try to roll it out as thin as you possibly can.


The Toppings
You can add any ingredients that tickle your fancy.
I used what you see below [anchovies, mushrooms, chorizo, olives, bocconcini]. I also added capers, fresh basil, chili flakes and the roasted grape tomatoes I made earlier (recipe above).

Some of the ingredients I used. I normally would have used Paesanella Buffalo Mozzarella, however I couldn't find it at my local supermarket [image by Zahara Dessert]

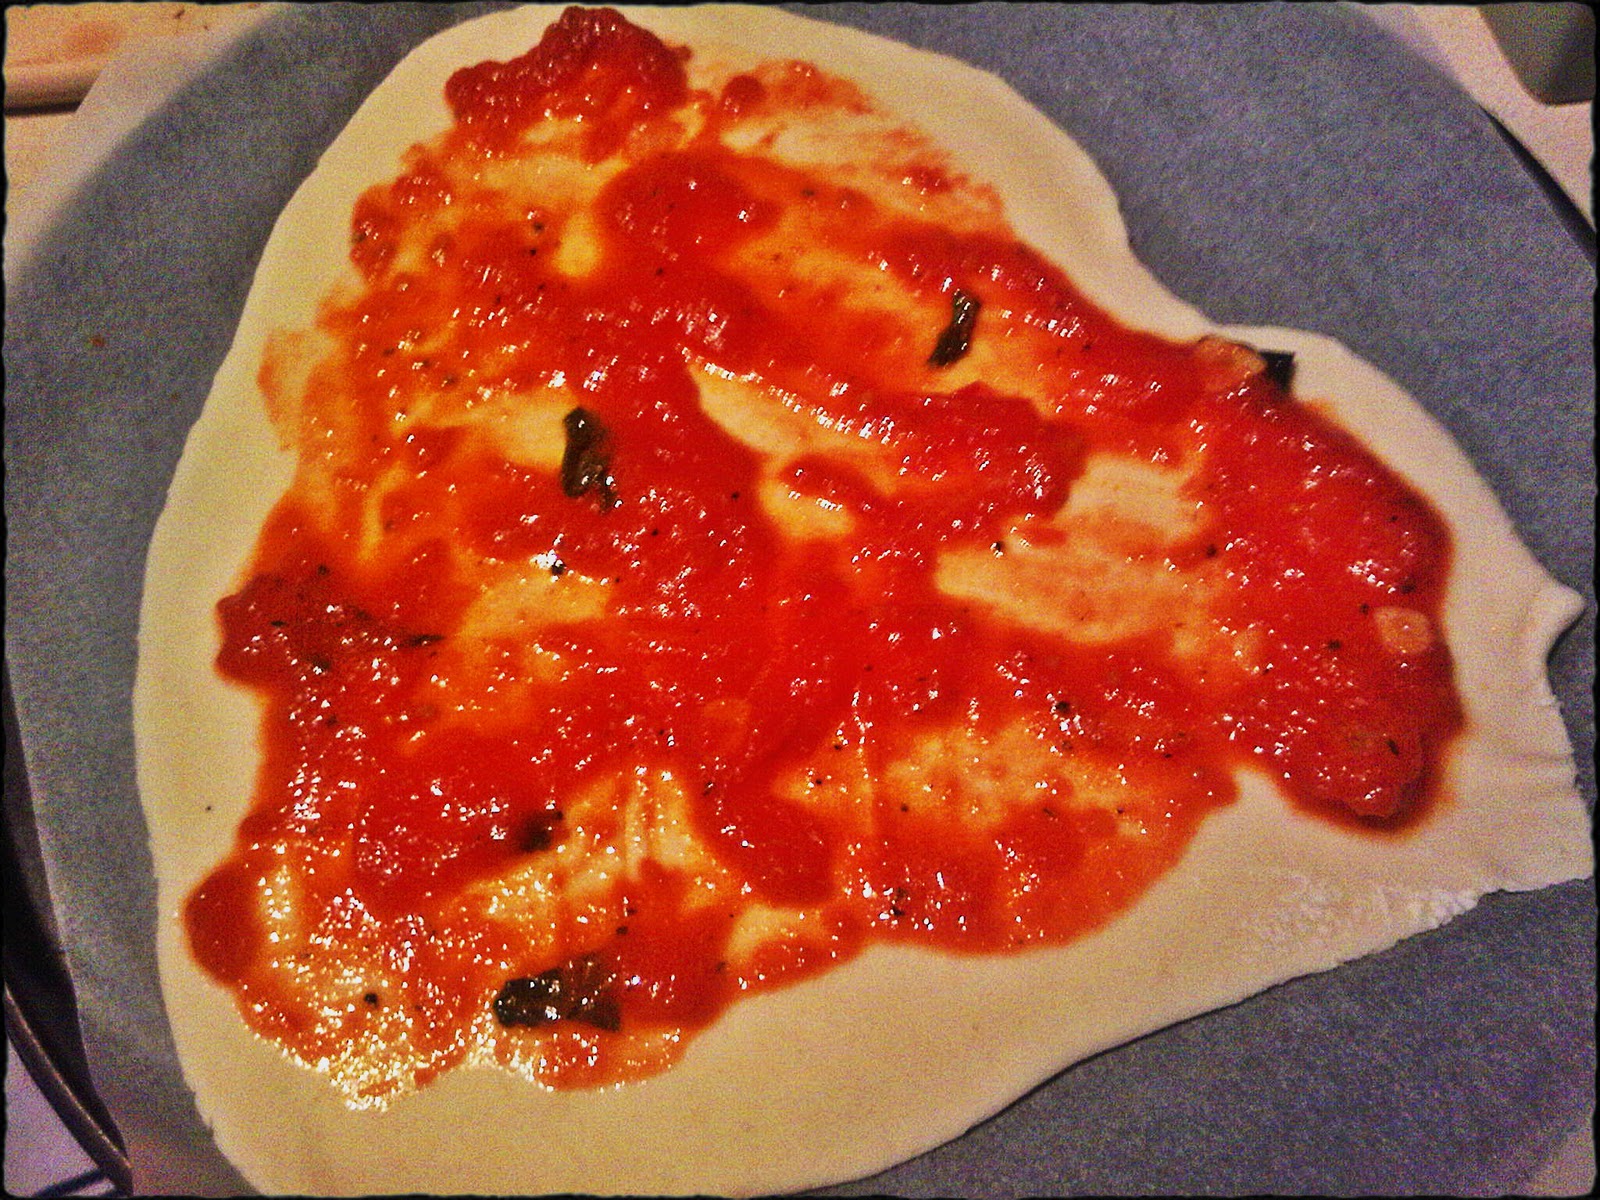
 Add a layer of the home made tomatoes salsa to the pizza base.
 
Add as much sauce as you like [image by Zahara Dessert]
Then add your desired toppings.

Use any toppings of your choice [image by Zahara Dessert]

It is up to you if you want to add Anchovies [image by Zahara Dessert]

Bake your pizza's in the over for about 15 minutes, or until the pizza looks cooked.

If using Buffalo Mozzarella, you might want to add the cheese after the pizza has come out of the oven, the residual heat melts the cheese slightly.


The final product [image by Zahara Dessert]
Enjoy!
Let me know if you make it and how your pizza turns out